Showing posts with label tutorial. Show all posts

Friday, May 24, 2013

My own darkroom! Really!

Remember when we used to take our 35mm film to the local drugstore for developing? When I wasn't looking, film developing became a boutique service not easily found in my town. Only one store handles film, and it costs about $15 to develop a roll and get the photos on disc. Sending my film out took a month and cost $12 per roll. The results were great, but the cost and turnaround time were frustrating.

As you know, I recently rediscovered film photography about two years ago. I own a bunch of nifty Lomography cameras, an Electro 35 from the early 70s, and a Canon Rebel SLR. I have been experimenting with different films and processes, but never at home. Then I did the math and realized how inexpensive it would be to set up a home dark room.

I started with this Pinterest board, where I pinned all of my research and created my own little self-study course. I watched dozens of videos, visited a camera shop, and talked to film veterans who knew a thing or two about processing.

Then I went shopping. Before I knew it, I had my own little darkroom, complete with developing tanks, reels, chemicals, and all kinds of helpful little gadgets. It looks something like this:

I am starting with C-41 processing, which is what you use with color negative film. I also want to try E6 for cross-processing when I gather more confidence.

A camera store owner in York, PA recommended this tank and reel set, so I can develop 120 and 35mm film:

I added some Lomography posters for inspiration...

And now I am ready to go! And yes, I do realize that I am the only person who repurposes a perfectly good third bathroom to make a dark room. I am awesomely weird that way.

Check out my Pinterest board for links to some helpful and interesting tutorials, videos, and how-to guides that will get you started with film developing. And watch this blog for updates as I dive into the deep end of home film processing! Thanks for reading!

Wednesday, May 22, 2013

Granny square happiness!

One day I decided to learn how to make a granny square. Well, I should say relearn, because I made a Christmas granny square throw for my great-grandma when I was about 10 years old. She displayed it on her living room hassock every December, and her praise for my work made me feel so special.

Fast forward 30 years, and here I am, getting back to my crafty roots. After a few months of following patterns and watching online tutorials, I decided to design my own granny square bag. I started with this:

Inspired, I grabbed some complementary colors and got to work!

Before I knew it, I had all of these. I had to find a way to put them together, so I threaded my neutral-colored yarn into an embroidery needle and used what I hoped was a basting stitch to turn a pile of little squares into the front of a bag.

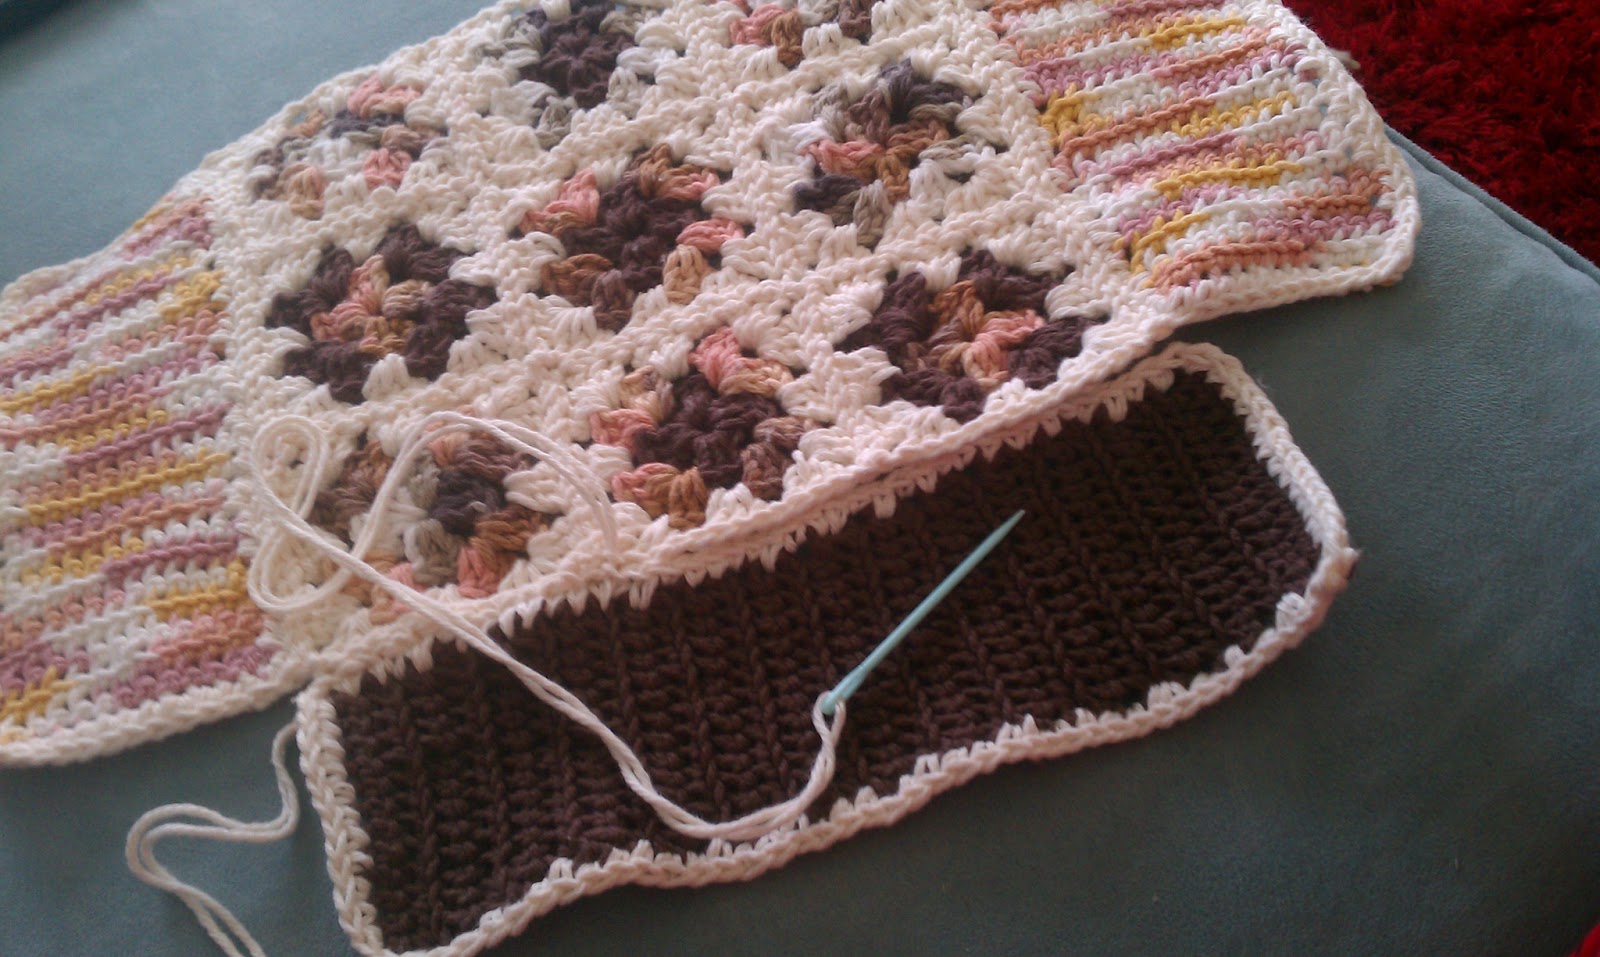
With the front and back sewn together, I realized that I needed some sides. What to do? I finally went with a double crochet to make two long panels.

Then I attached the sides...

And realized I needed a bottom! Quickly I double crocheted a brown bottom and sewed it in! I discovered that creating a three-dimensional bag requires a fair amount of geometry, a weak subject for me. But somehow I managed, and the math worked!

Wow! A little more work, and I ended up with this:

I also made straps with long strips of double crochet panels much like the side panels. I encountered some problems with these, so I won't be sharing the final pics here.

There it is. My first design! I am thrilled beyond belief! My first success so inspired me that I have been designing and creating every day. I never realized how much joy and calm there is in crocheting and making something new.

Monday, January 21, 2013

I made this hat, and I can't believe it!

For the first time I can remember, I am actually keeping my New Year's resolution. It is easy to do when you choose something you believe in. I promised to create something new every day of the new year. Over the past few weeks I have written, learned to sew, studied crochet tutorials, and curated quite a few Pinterest boards. I have organized a Thirty-One fundraiser to support a friend's effort to get a service dog for his daughter with autism. And I made a hat. And actual HAT.

There it is! I chose this pattern for a few important reasons:

The pattern was easy to understand

The pattern was accompanied by a video tutorial to help me understand the pattern shorthand that has always stymied me.

The project helps me learn

This project required the use of stitch markers to keep track of the round crocheting that has often troubled me. It incorporates a new stitch, the Front Post Back Post Double Crochet, and starts with the Magic Circle, an alternate way of starting crocheting in the round.

I get to create something I can use

I have always wanted a slouch hat and, since moving to a town with very cold winters, I needed a new hat to keep my head warm while walking around town.

I absolutely LOVE the pattern I used! I found a very helpful tutorial video created by crochet maven April Draven. She offers this pattern for free here, on her blog.

And the best part? It took me a few hours over two days, and I ended up with something I really, really love! These pictures, taken with my phone, don't do it justice, so hopefully I will soon be able to replace these with pics from my DSLR.

Oh, and this is meant to be a slouch hat, not a Dr. Seuss hat. I didn't have the nerve to model it for my blog, so more pics will have to wait for a better hair day.

Tomorrow I plan to share my progress making my first ever crocheted bag!